
ComfyUI has been on my Todo list on things to try out since I first learned of Stable Diffusion last year. I've been pushing it off and trying to get Automatic1111 to work, but I finally caved after needing to run more complex workflows and produce more images.
To my surprise, ComfyUI is not nearly as difficult as anticipated to learn and set up; however there were certainly a few gotchas that I will help you avoid in this guide.
Background
ComfyUI was created by a member of the community who goes by ComfyAnonymous. It was modeled after the node(modular) like UI of Blender, to optimize for being performant while still keeping it easy for beginners to pick up (interactions are all drag and drop).
ComfyUI works so well, that Stability AI, creators of Stable Diffusion, actually use ComfyUI internally for testing! This gives a lot of confidence in the dashboard and means that it will probably remain as the defactor production UI for the long run.
Currently, the github repository serves as the official homepage for ComfyUI. Click the link if you want to check it out further.
What environment: Mac, PC, Google CoLab, etc...?
This is important, as there are a lot of articles online, along with many services that purport to do the same thing, and all claim to be the best way to run ComfyUI.
For me, I've tried running on my M1 Macbook Pro 2020, and I was able to get it to work, but running SDXL v1.0 is excruciatingly slow (~5-10 min per generation). Running SD 1.5 might be tolerable, I will test that out soon!
I ended up using Google CoLab, which I believe is the most straightforward and pain-free way to get started with ComfyUI.
Note: I don't recommend trying to use the free version of Google Colab, at this point google is aware of how resource intensive these Stable Diffusion Colabs are, and the colabs will power down/disconnect intermittently.
The rest of this guide assumes that you have Google Colab Pro as it is highly highly recommended.
Google CoLab allows you change the GPU which can help you generate images faster, at the cost of burning your credits faster.
So far this is my experience:
- Google Colab Pro membership: $10
- 100 compute units granted per month
- The credits expire after 90 days
- Generally they will grant you ~100 hours of runtime with A100 GPU or T4GPU - I recommend using A100
ComfyUI Colab
The official ComfyUI github provides a Google Colab, but I actually prefer to using this one. The reason for using the second one, being that someone created an extension manager for ComfyUI that has gotten a lot of traction and makes it a lot easier to expand the ComfyUi functionality. This guide will cover how to use the second one.
Step 0: Access the Colab and set the GPU
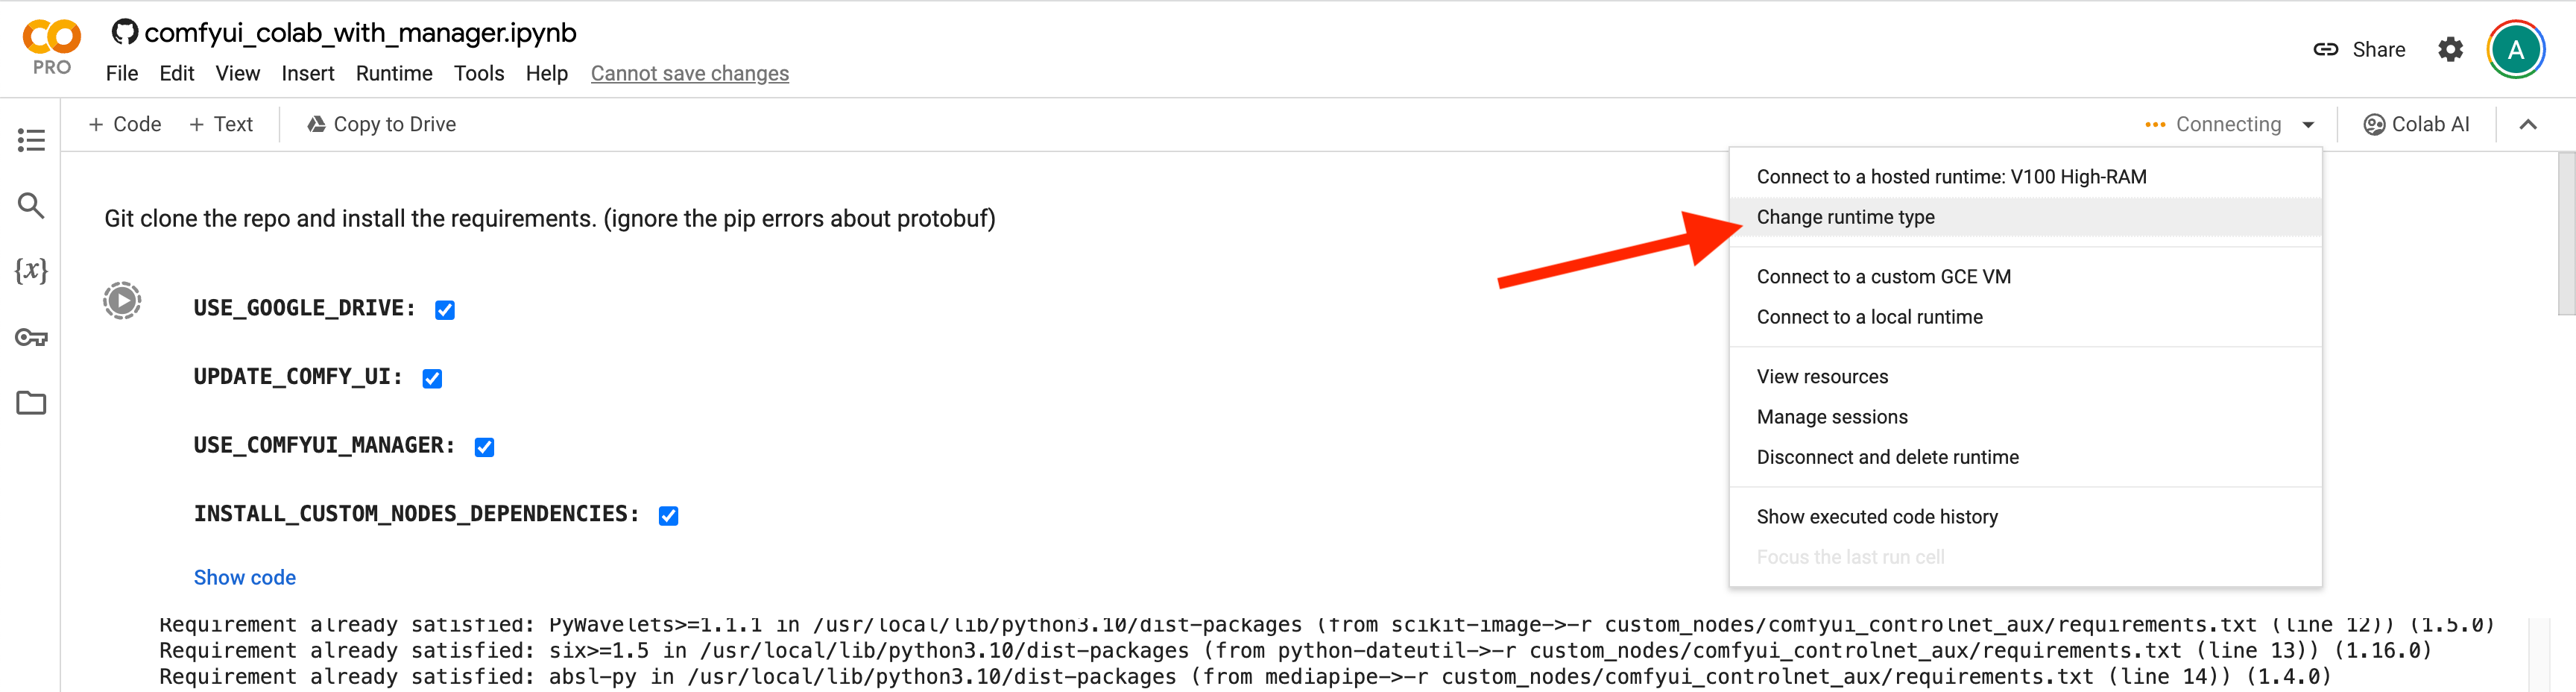
- Navigate to the google colab: https://colab.research.google.com/github/ltdrdata/ComfyUI-Manager/blob/main/notebooks/comfyui_colab_with_manager.ipynb
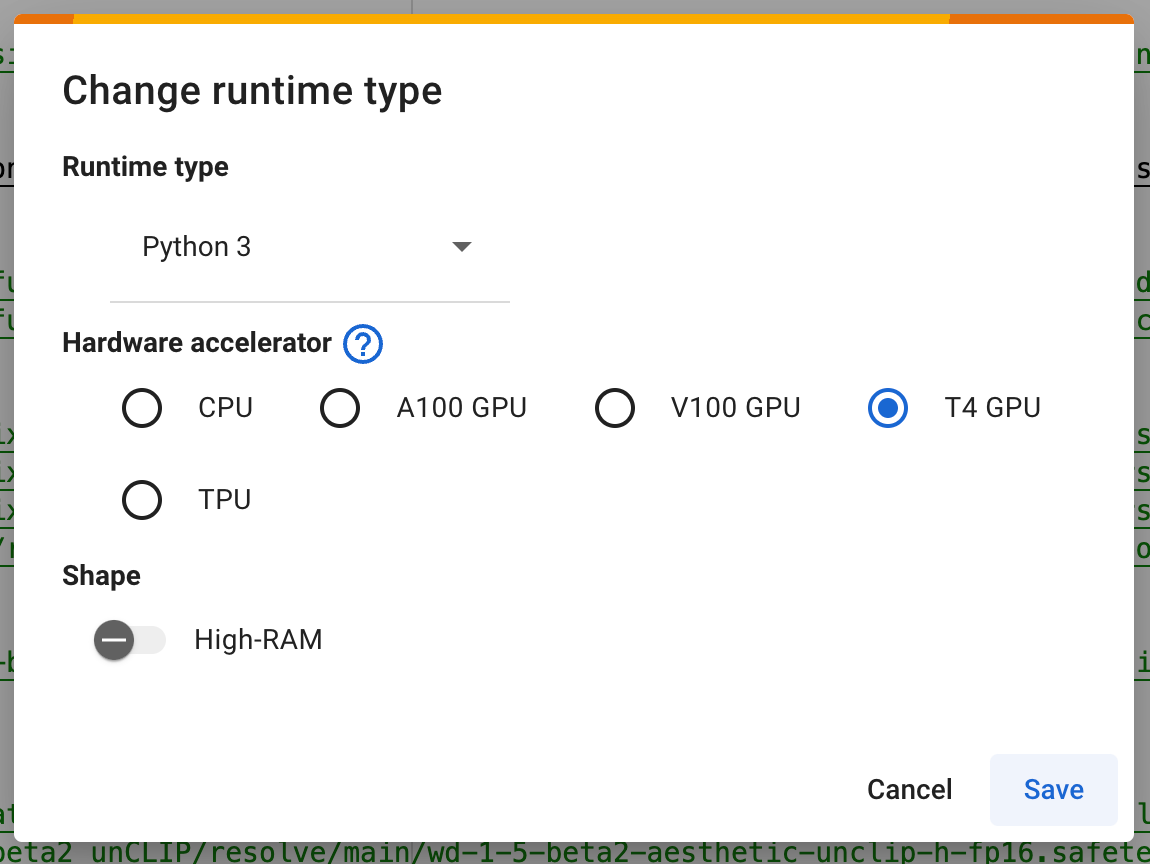
- Change the Runtime type -> Hardware accelerator, so we can get quick image generations
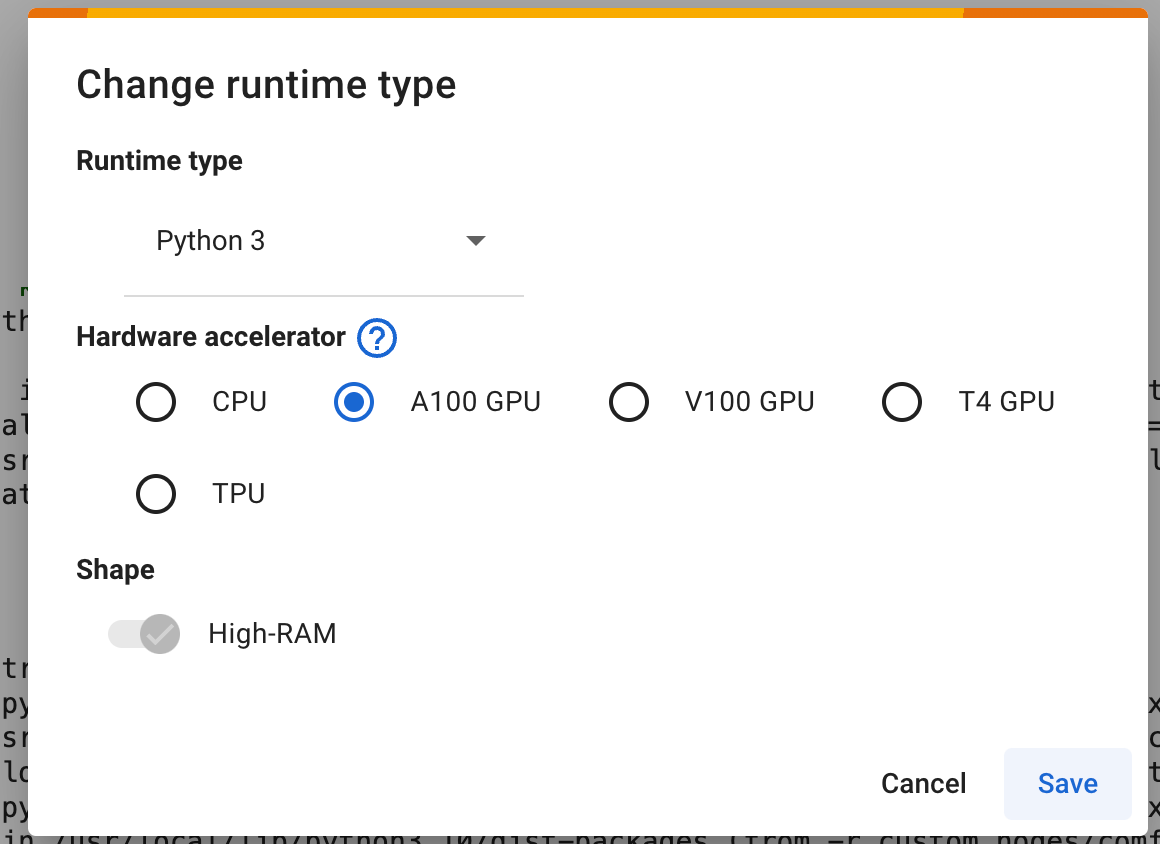
Select A100 GPU
Step 1: Install the Requirements
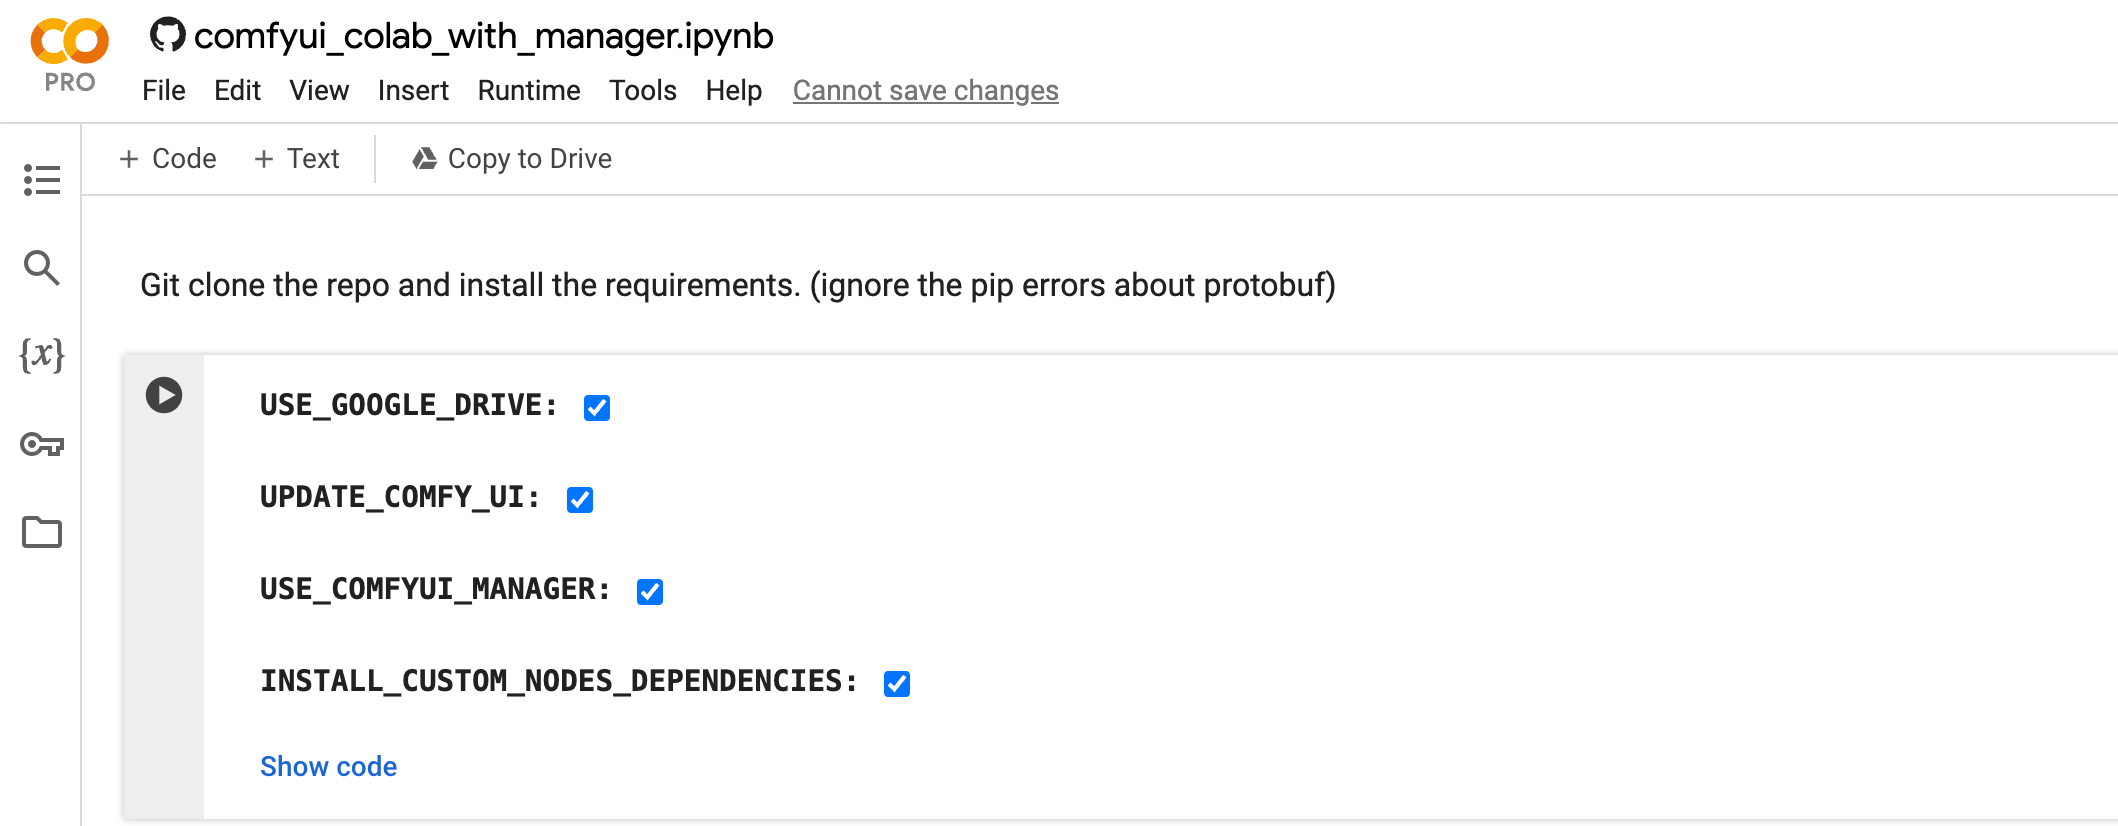
- Check USE_GOOGLE_DRIVE
- This is not required, however I recommend it so that you don't have to download the models each time, as it can be a long process. (If you don't connect to google drive, Google Colab gives you ample disk space, so storage shouldn't be a problem even when the models are super large(~8GB))
- Check UPDATE_COMFY_UI
- This ensures that you have the latest updates to ComfyUI, as it's a work in progress and developments in AI are happening rapidly, checking this is a must
- Check USE_COMFYUI_MANAGER
- This is the extension manager addition and why we are this particular google colab
- Check INSTALL_CUSTOM_NODE_DEPENDENCIES
- The dependencies needed for ComfyUI
Run this google colab step by clicking the big play button:

Step 2: Install the Models
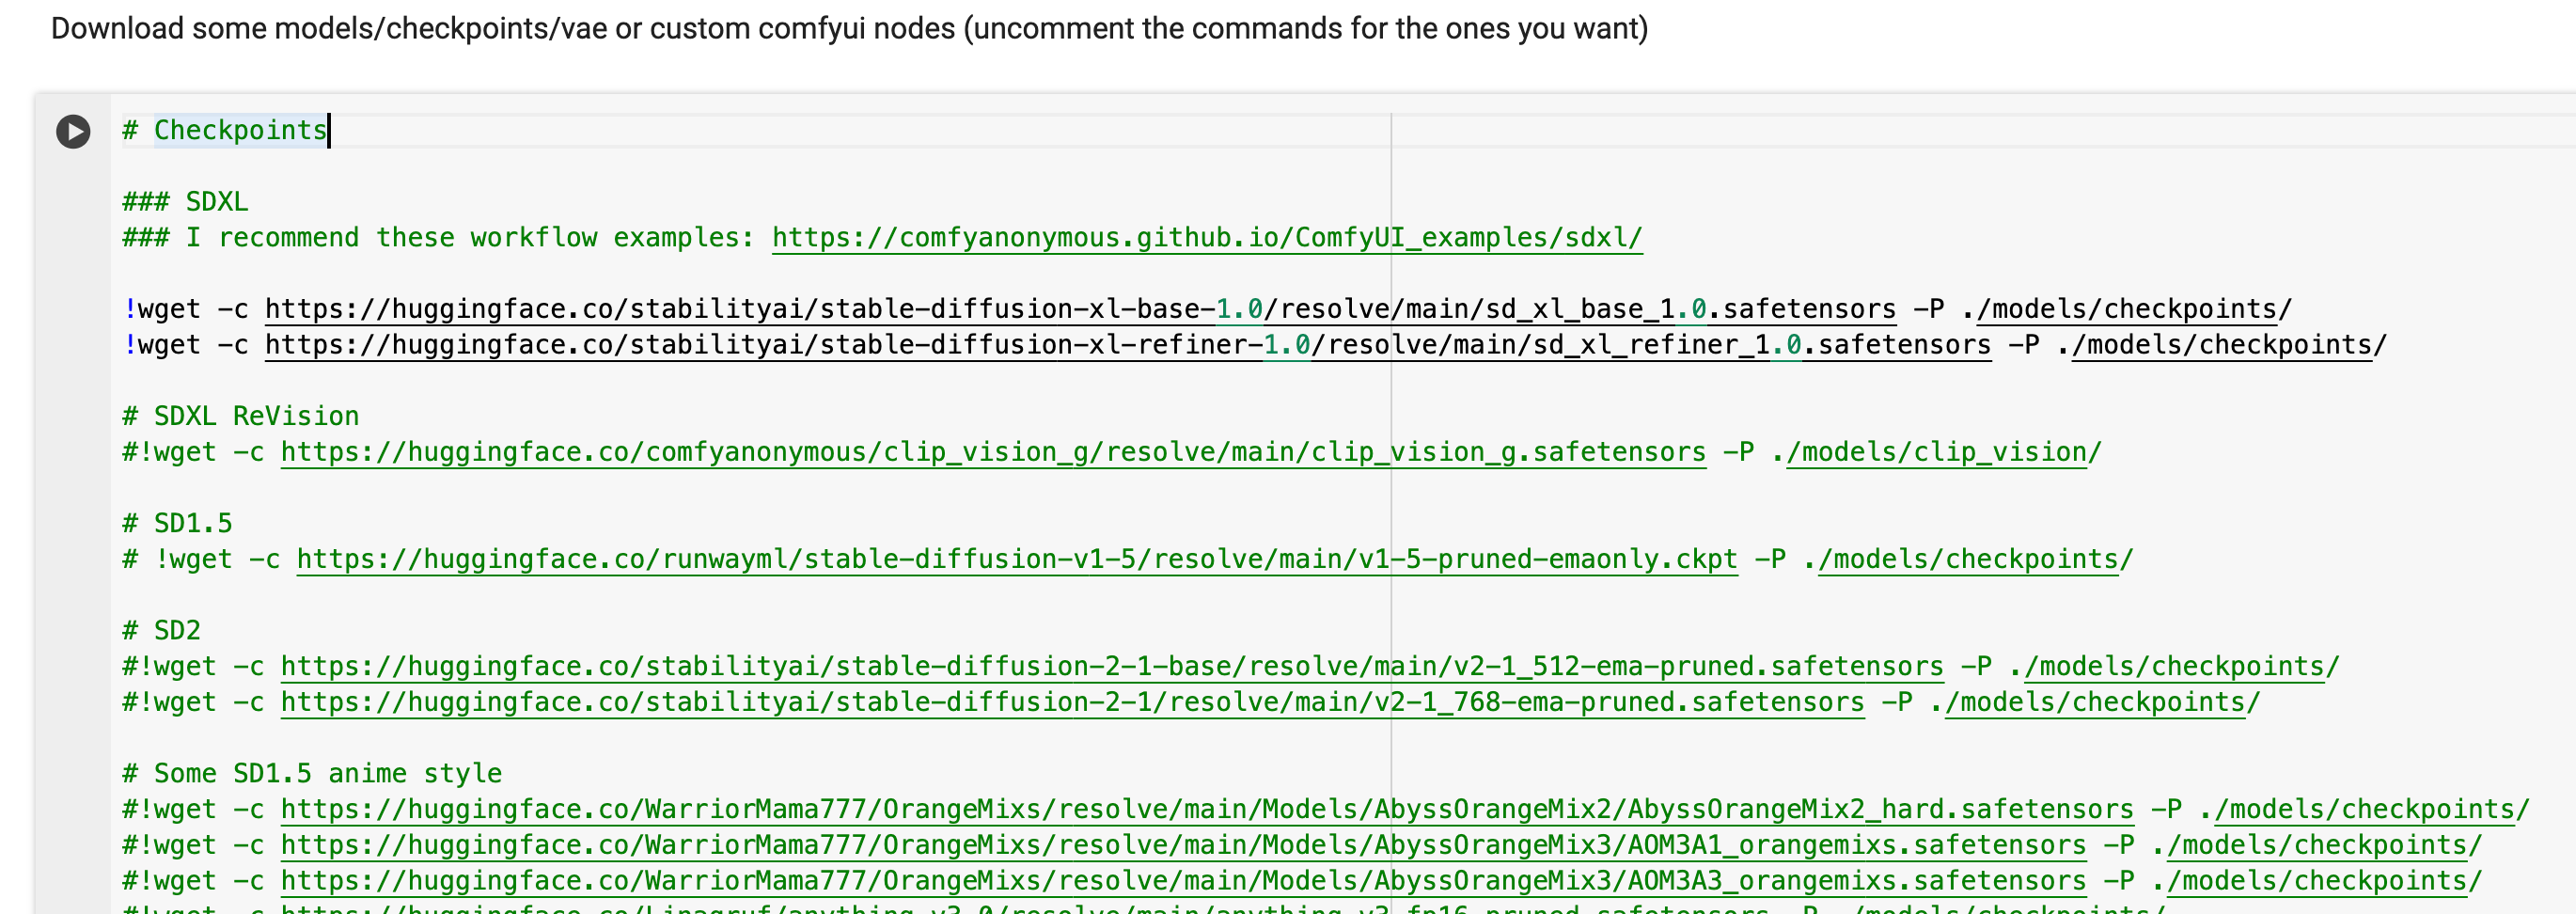
This step installs the actual text2img models. There are a lot of models here, so I'll let you decide which you want to try out. If you have connected to google drive, it will download to your drive otherwise, it will download it to the temporary environment that will live as long as your google colab notebook session is live.
For this guide, we'll be using SDXL v1.0, the latest greatest Stable Diffusion model. To include the models uncomment the lines as follows:
- The in the beginning of the line comments that line out, making it not active
Loading...- Remove the character by pressing Command(Windows) + "/" or just deleting it, it should look like this afterwards
Loading...Run this google colab step, it should take a while depending on how many models you've uncommented (~10 min)
Step 3: Run ComfyUI
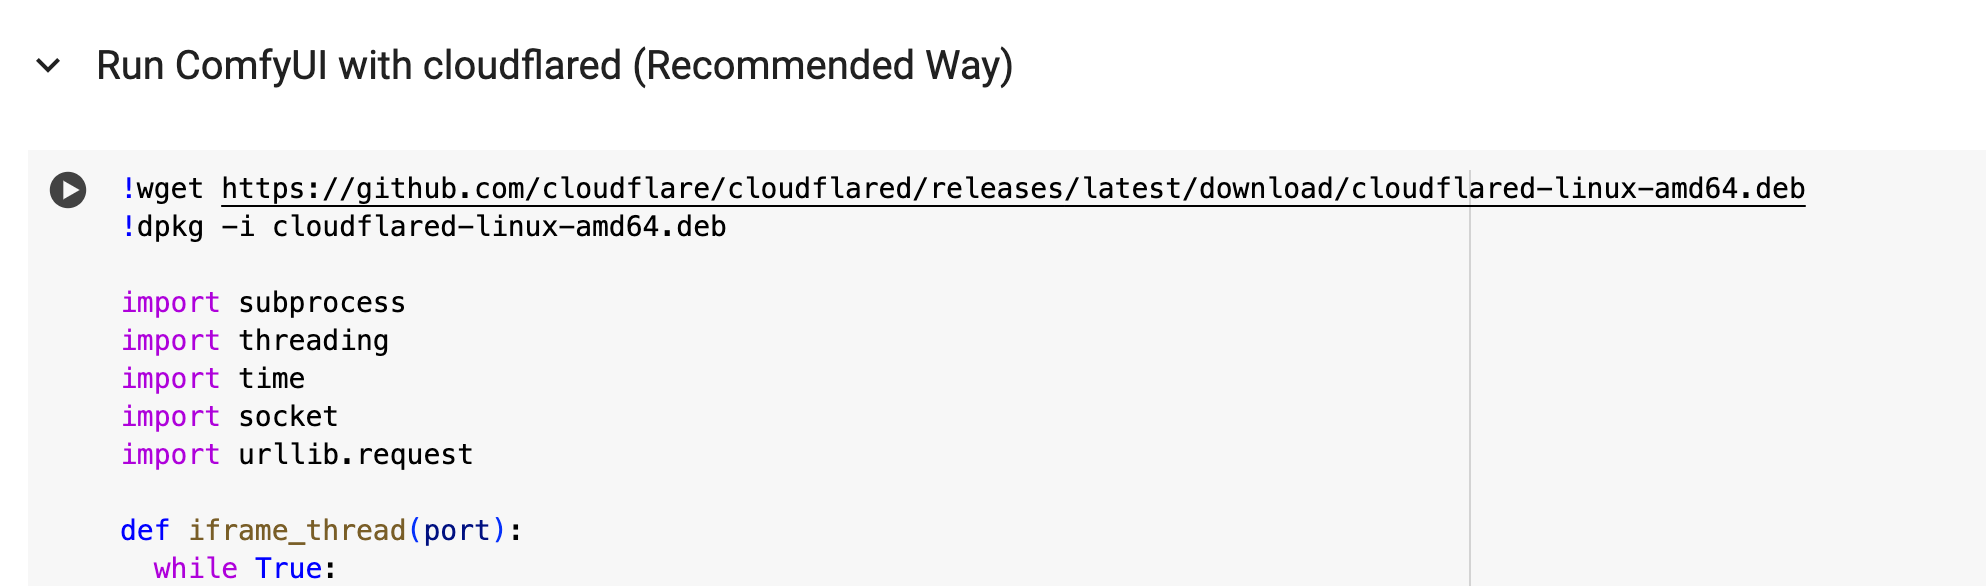
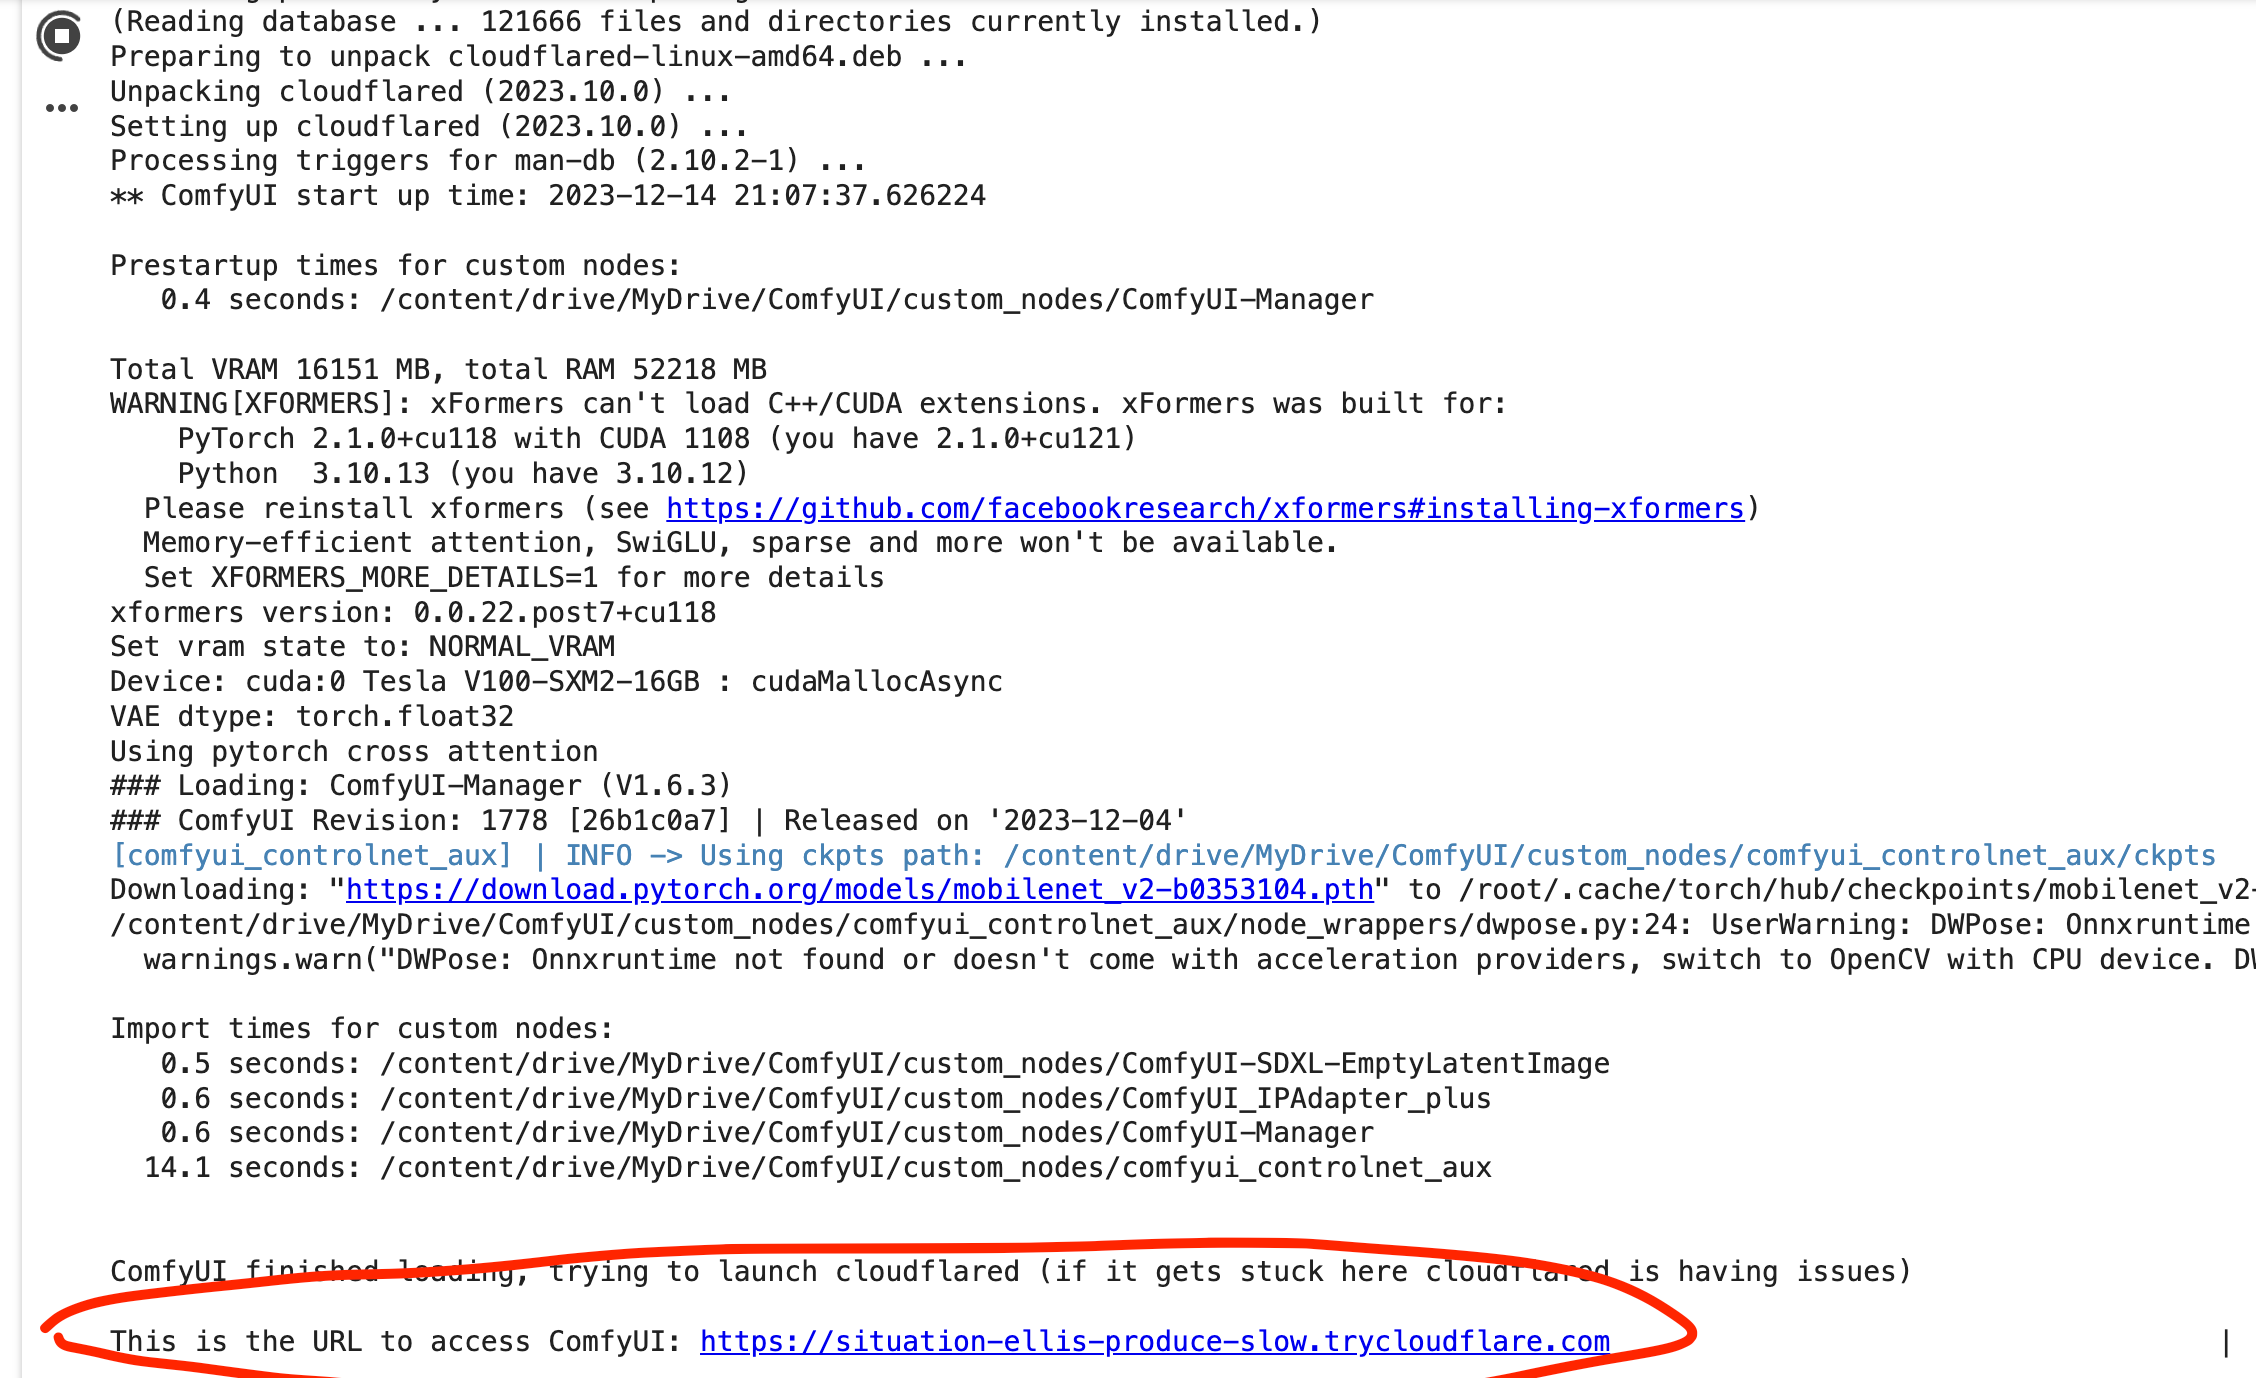
This step will launch the comfyUI instance for you to connect to so you can run this google colab step and then we'll wait until it outputs the URL for us to connect to our ComfyUI instance. (~10 min)
Once the instance is running you should see a url that looks like this for you to connect:
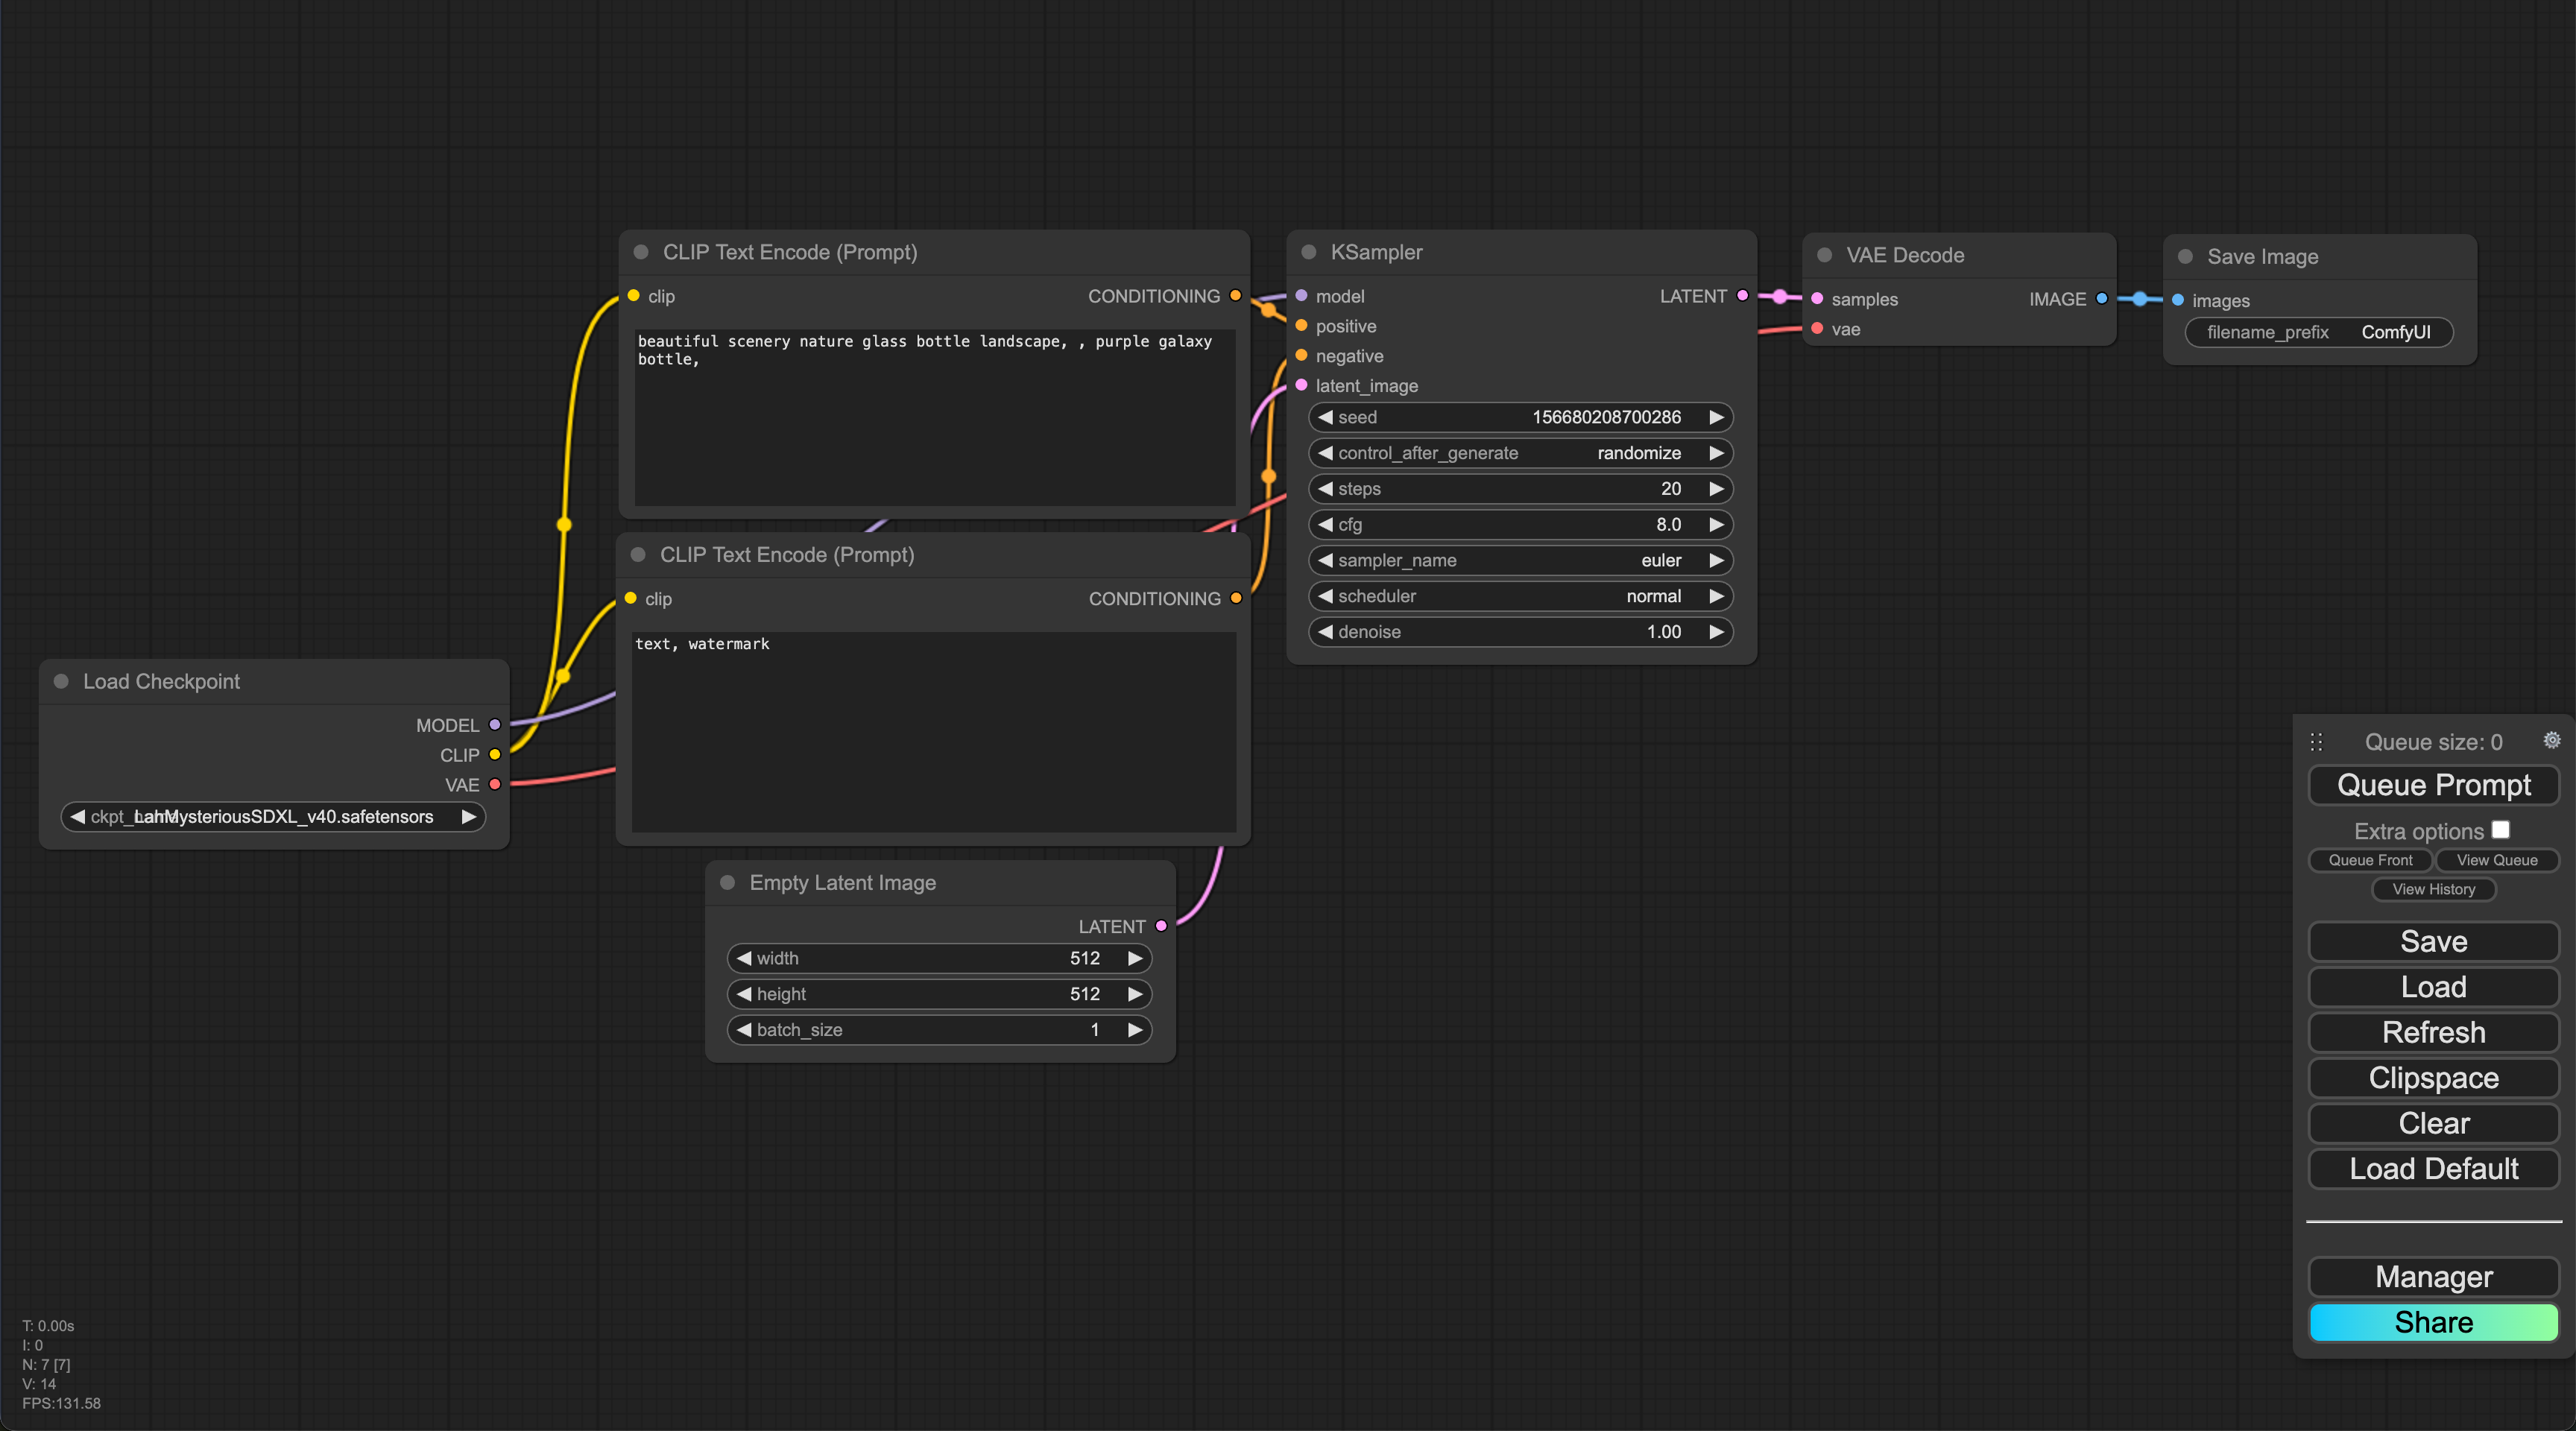
ComfyUI Interface
Upon navigating to the link, this is what you should see right away. Don't be intimidated we'll go through each of the nodes and break it down for you.
Additionally if you learn better with video content, I recommend this video to get started.
Load the Default Workflow
ComfyUI is centered around Workflows, so each collection of nodes and arrows, is deemed a workflow and thankfully there are a bunch of predefined workflows, courtesy of the comfyanonymous and members of the community. For now, let's load the default workflow, by selecting "Load Default" in the module shown below.
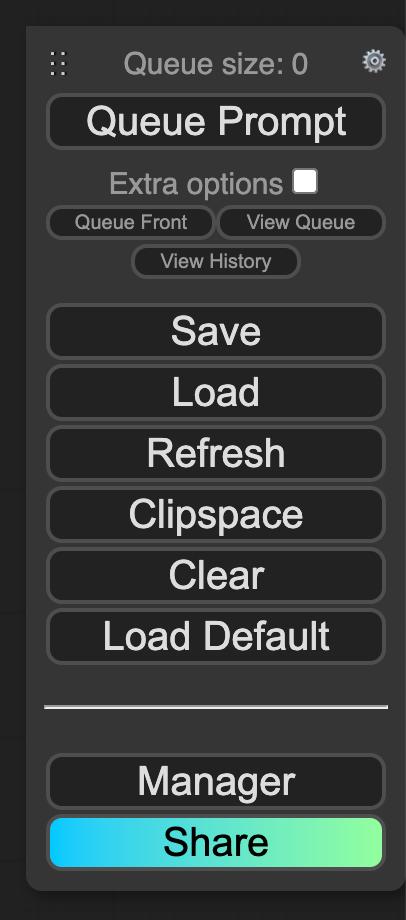
From here, let's click "Queue Prompt", and you should immediately see you've successfully generated your first image using ComfyUI! 🎉
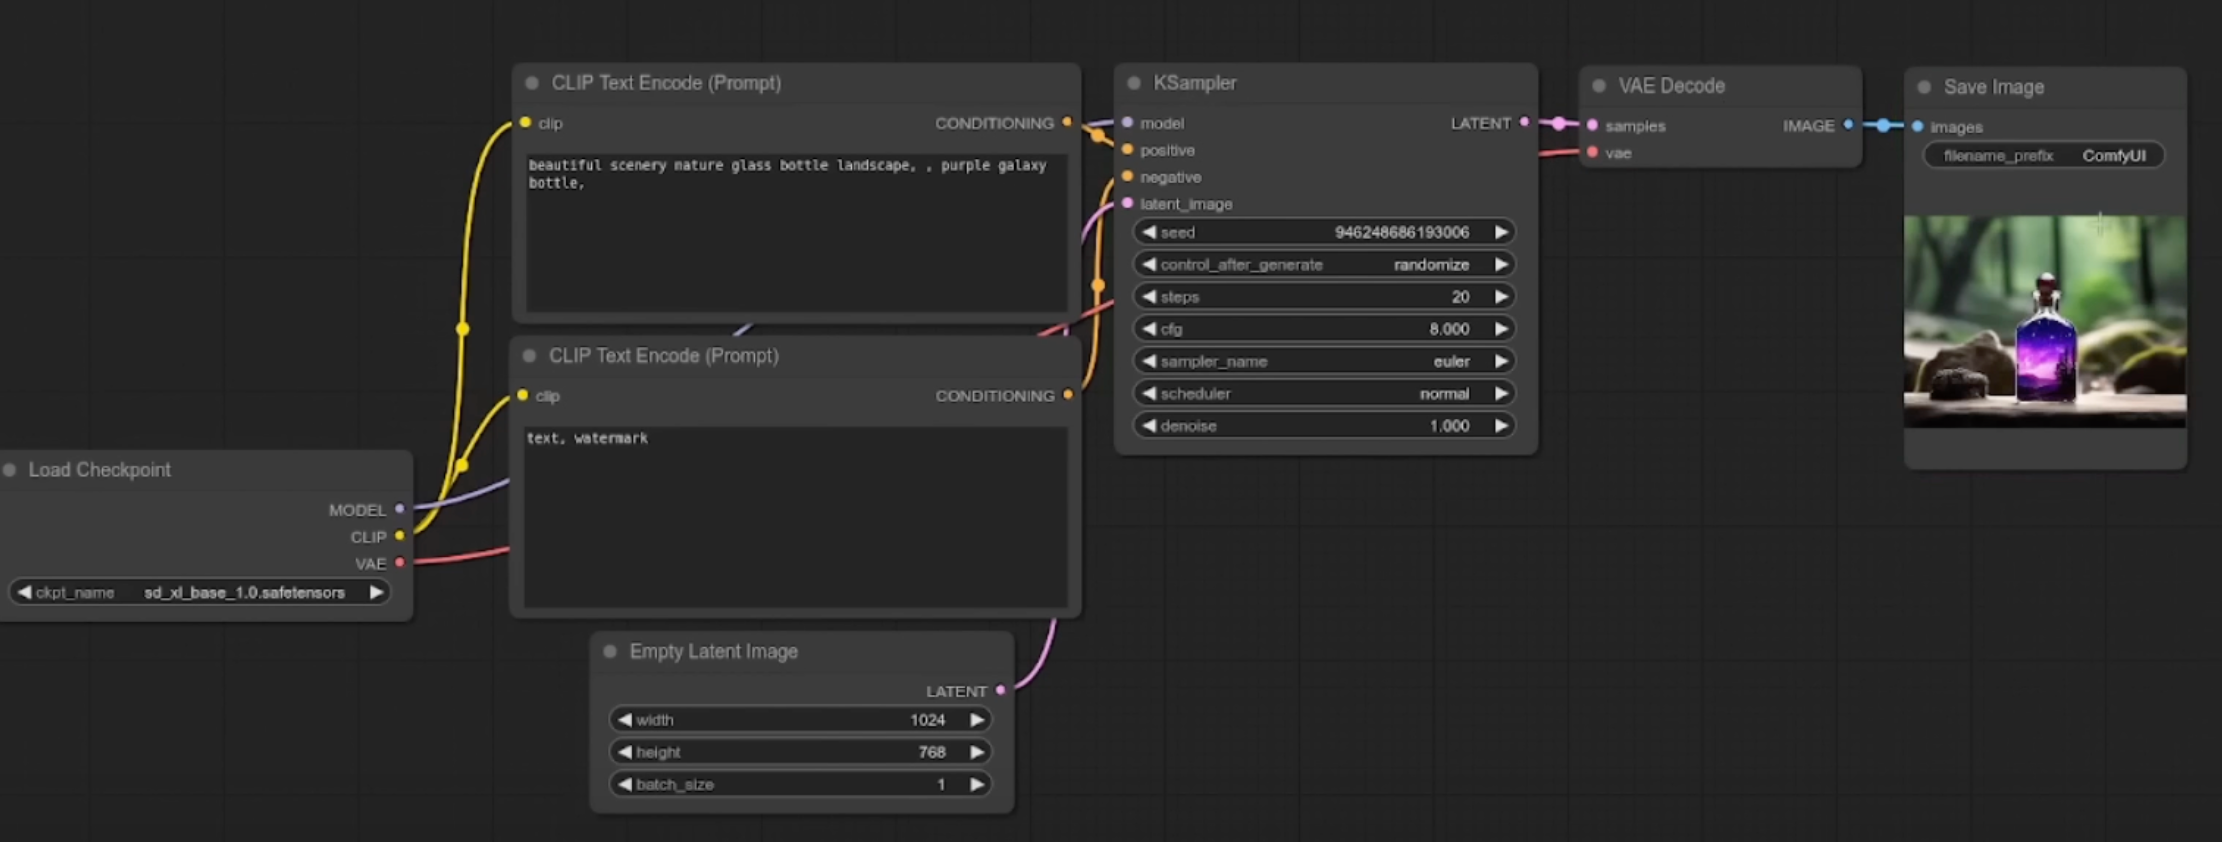
ComfyUI Basics
This UI is great because it's able to show the actual steps needed for image generation with Stable Diffusion, since everything is node based, we are able to see how we go from the Stable Diffusion model to an actual output image.
We'll break down the components one by one:
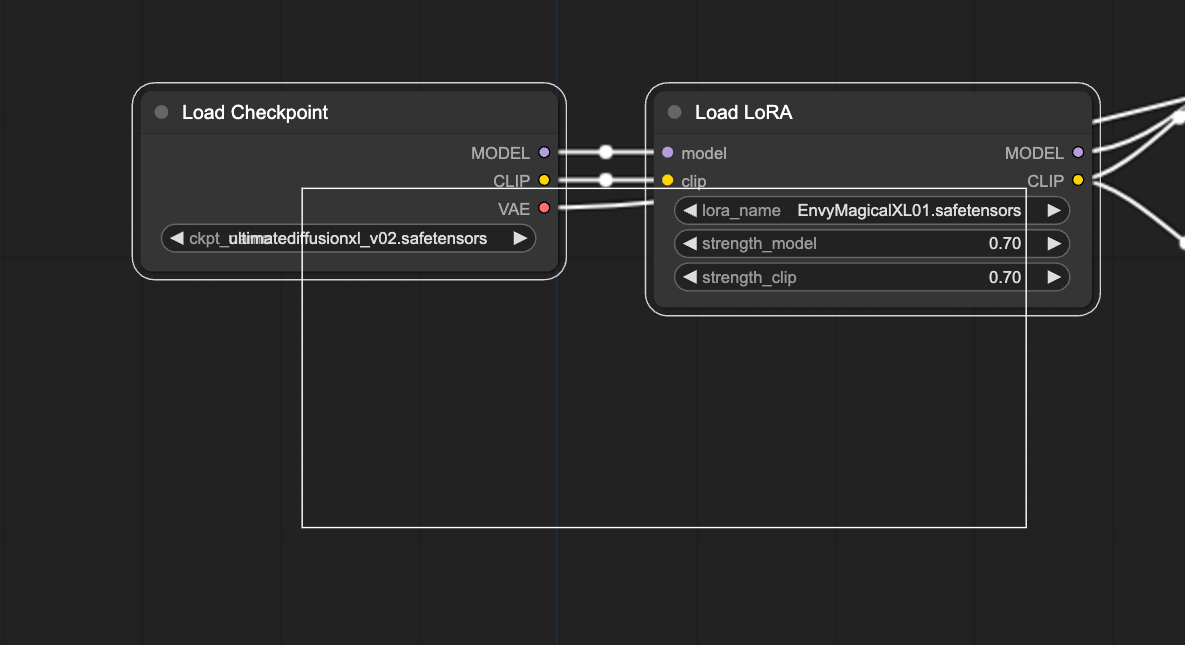
Load Checkpoint
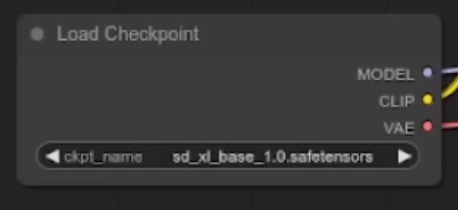
The first node has 3 main components
- MODEL: The noise predictor model in the latent space.
- CLIP: The language model preprocesses the positive and the negative prompts
- VAE: The Variational AutoEncoder converts the image between the pixel and the latent spaces
So, as you can tell from the above, each model comes with a clip model which is a language embedding model that is able to output a vector embedding that the Stable Diffusion Model is able to understand from your inputted plain text.
The model uses the vector embeddings that are outputted from the clip model and an input image that's purely noise and starts predicting based on what it was originally trained on.
The VAE will usually be the last step before you output an image, as it takes the data, that occupies latent space and converts it to image (pixel space). This is as technical as we'll get, but essentially all throughout the workflow, the image data is getting computed in a special coordinate environment that the machines understand and eventually we convert it back into the pixels and x, y coordinates that is easy for humans to understand and perceive as images.
The Prompt
If you are familiar with text2img models, this segment is pretty straighforward and it's inline with what we're used to from Automatic1111. Now we can see the actual parts hardwired to make the magic happen, our prompt is given a CLIP model to translate it so that the machines can understand and use it.
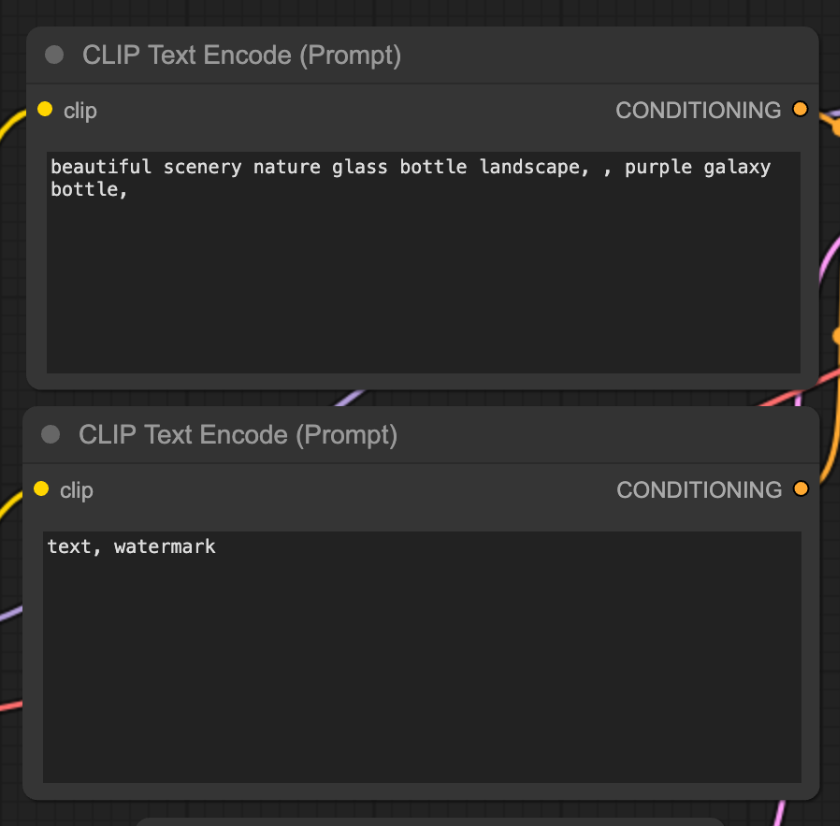
- Top is positive, and bottom is negative
The outputs from this node, is a vector embedding that the main engine of our diffusion model will run in.
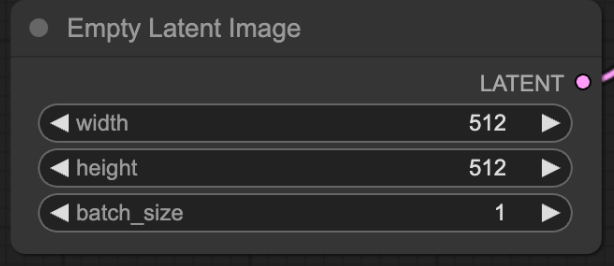
Empty Latent Image
This is the input latent image that the model uses to start generating an image from. Generally, this is just a grid of noise, since the AI needs canvas to start working off of. This is essentially that blank slate.
- For SD 1.5
- Use 512 by 512
- For SDXL v1.0
- This model was trained on images of size 1024 by 1024, so highly recommend using 1024 x 1024 or larger when using the SDXL v1.0 model
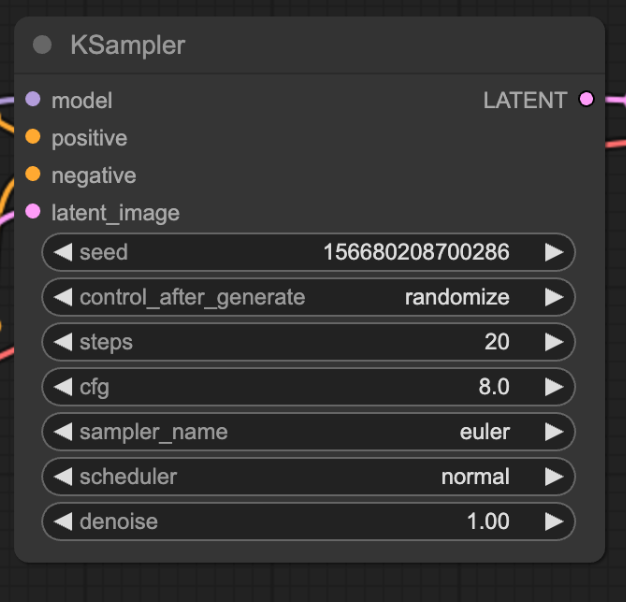
KSampler
This is the main engine of our image processing. In here, we have the samplers that describe different algorithms for outputting our eventual image.
- For beginners I recommend using the following settings (this also holds true when using Automatic1111 UI)
- seed: 0
- control_after_generated: fixed
- When testing I recommend fixed so that you can have more controlled outputs and it will allow you a control point to compare when you tweak other elements - if you want more varied outputs set to random
- steps: 35
- Generally 30-60 is a good range for this
- cfg: 8.0
- Keep within 7-11 range. It dictates how closely the model will follow your prompt, the higher the value, the more it will listen to your prompt
- sampler_name: euler
- Euler is fairly good for consistency, you can use dpmpp_3m_sde_gpu for more detailed outputs
- scheduler: normal
- Normal works well with euler, when using dpmpp_3m_sde_gpu, I recommend karras scheduler
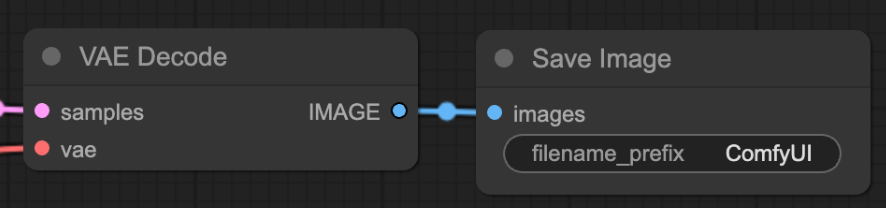
VAE and Output
As mentioned before this step converts from latent space to pixel space. This is a crucial step in converting from data that the computer/machines understand to data that we humans understand.
You can output to any directory you desire.
Additional Pointers on using ComfyUI
- Ctrl (control) + drag to select multiple nodes at the same time
- Items will be outline in white when they are selected
- Once multiple are selected, you can use Shift + Drag to move them around
- This should help you keep your workflow organized
- You can quick add nodes by double clicking on any empty area of the comfyUI workspace
- This will open a search dialog as shown below, and from there you can search, and filter through whatever nodes are available to you in your comfyUI
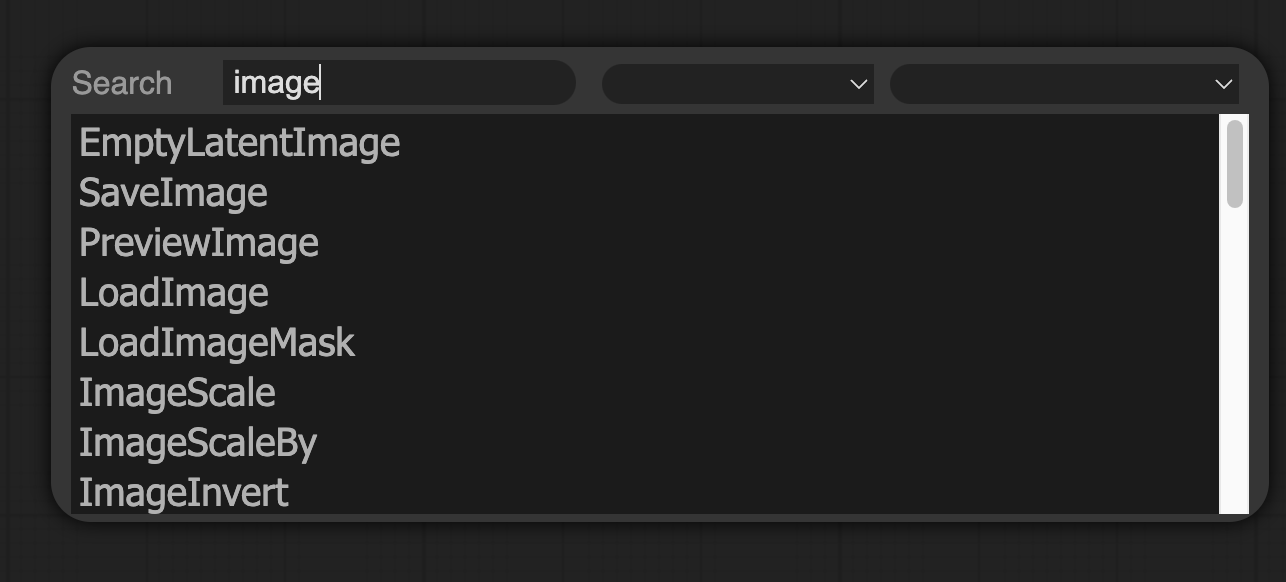
This is where the ComfyUI Manager becomes super helpful
There are several nifty extensions that have been designed to help you maximize the usefulness of ComfyUI - learn more about how to use that here: https://github.com/ltdrdata/ComfyUI-Manager?tab=readme-ov-file
Conclusion
Now you know the basics of working with ComfyUI in order to generate images. I recommend playing around with it and trying to build your own workflows!
Next Steps
- Example workflows to try: https://comfyanonymous.github.io/ComfyUI_examples/
- Stay tuned for our guide on how to use Control Nets in ComfyUI
